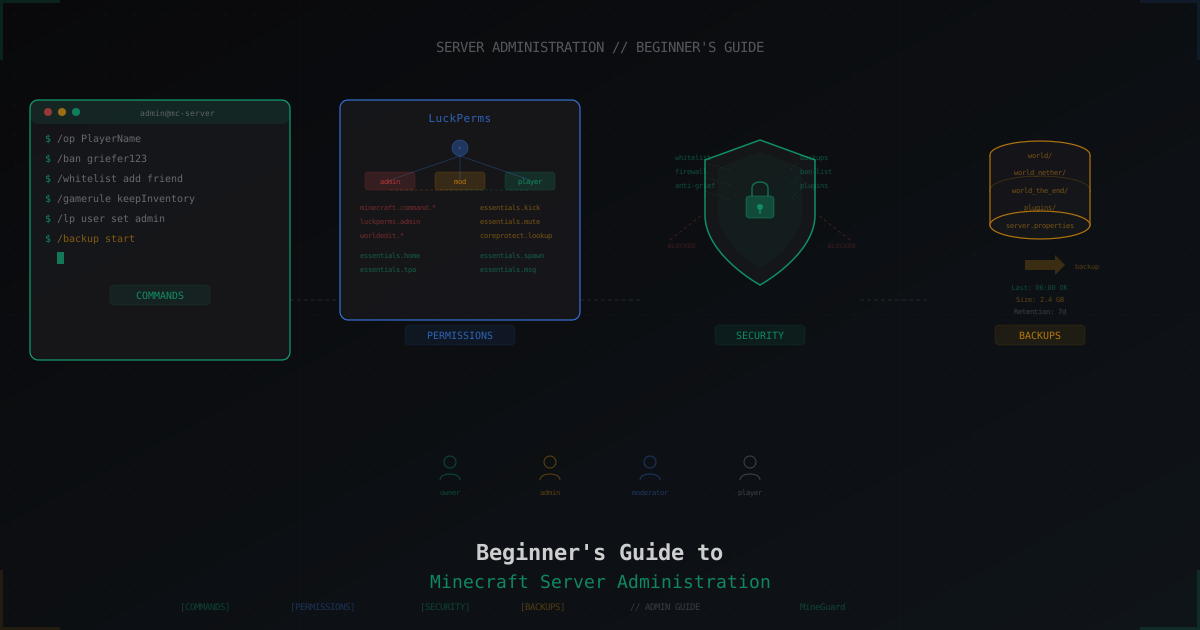
Beginner's Guide to Minecraft Server Administration
So you've set up your first Minecraft server. It's running, the MOTD looks good, friends have joined. Now what? How do you keep things from falling apart in the first week?
Server administration isn't rocket science, but it's not trivial either. There's a lot of stuff you need to know and configure right away - not after someone griefs the entire spawn or your world disappears because you never set up backups.
This guide is for people who are just getting started. We'll cover everything from basic commands to security.
Day One: What to Set Up Immediately
Don't rush to install plugins and mods. Start with the basics.
server.properties
This file is the heart of your server configuration. The most important settings:
server-port=25565
max-players=20
online-mode=true
white-list=false
difficulty=normal
gamemode=survival
spawn-protection=16
view-distance=10
motd=Your server name
Key points:
- online-mode=true - ALWAYS. If you set this to false, anyone can join under any nickname, including yours. It's a security hole the size of a Nether portal
- spawn-protection - radius in blocks around spawn where only operators can build. 16 is a reasonable value
- view-distance - higher means more load. 10 is a good balance. If you're lagging, drop it to 8 or 6
Becoming an Operator
First thing you need to do is give yourself operator status. Two ways:
- Through the server console (not in-game):
op YourName - Through the ops.json file
Operators can do everything: ban, kick, change gamemodes, teleport. But don't hand out OP to everyone. One person with OP can destroy everything in a minute.
Server Folder Structure
Know your directory layout:
world/- the main world (Overworld)world_nether/- Netherworld_the_end/- Endplugins/- plugins folder (Paper/Spigot)logs/- server logsserver.properties- main configurationops.json- operator listbanned-players.json- ban listwhitelist.json- whitelist
Essential Commands
These are the commands you'll use daily. All entered with / in chat or without / in the console.
Player Management
| Command | What it does |
|---|---|
/kick PlayerName reason | Kicks a player from the server |
/ban PlayerName reason | Permanent ban |
/ban-ip IP reason | IP ban |
/pardon PlayerName | Unban a player |
/pardon-ip IP | Unban an IP |
/op PlayerName | Grant operator status |
/deop PlayerName | Revoke operator status |
Whitelist
| Command | What it does |
|---|---|
/whitelist on | Enable whitelist |
/whitelist off | Disable whitelist |
/whitelist add PlayerName | Add a player |
/whitelist remove PlayerName | Remove a player |
/whitelist list | Show all whitelisted players |
World Management
| Command | What it does |
|---|---|
/gamemode survival/creative/spectator PlayerName | Change game mode |
/difficulty peaceful/easy/normal/hard | Change difficulty |
/time set day/night/noon | Set time |
/weather clear/rain/thunder | Set weather |
/gamerule keepInventory true | Keep items on death |
/gamerule mobGriefing false | Prevent mobs from destroying blocks |
/tp PlayerName x y z | Teleport a player |
/setworldspawn | Set the world spawn point |
Console Commands
| Command | What it does |
|---|---|
say Message | Send a message as the server |
stop | Stop the server |
save-all | Force save all worlds |
list | Show online players |
Permissions: LuckPerms
OP is a blunt instrument. A player either can do everything or nothing. For proper permission management, you need a plugin - and LuckPerms is the industry standard.
Installation
- Download LuckPerms from luckperms.net
- Drop the .jar into
plugins/ - Restart the server
- Done
How It Works
LuckPerms operates with groups and permissions. The idea is straightforward:
- Create groups:
default,vip,moderator,admin - Assign permissions to each group
- Add players to groups
- Groups can inherit permissions from each other
Basic LuckPerms Commands
Create a group:
/lp creategroup moderator
Give a group permissions:
/lp group moderator permission set essentials.kick true
/lp group moderator permission set essentials.mute true
/lp group moderator permission set coreprotect.lookup true
Add a player to a group:
/lp user PlayerName parent set moderator
Set up inheritance:
/lp group moderator parent add default
/lp group admin parent add moderator
Recommended Group Structure
default (all new players):
essentials.home- set a home pointessentials.tpa- teleport requestsessentials.spawn- teleport to spawnessentials.msg- private messagesessentials.helpop- message moderators
vip (inherits default):
essentials.sethome.multiple.3- 3 home pointsessentials.back- return to death locationessentials.hat- block on head (fun feature)
moderator (inherits vip):
essentials.kick- kick playersessentials.mute- mute playersessentials.tempban- temporary banscoreprotect.lookup- check who broke whatcoreprotect.rollback- roll back griefessentials.vanish- invisibility
admin (inherits moderator):
essentials.ban- permanent bansworldedit.*- WorldEditluckperms.admin- permission managementessentials.gamemode- gamemode switching
The principle: give the minimum permissions necessary. A moderator doesn't need WorldEdit. A player doesn't need kick. Fewer permissions = fewer problems.
Web Editor
LuckPerms has an excellent web editor. Run /lp editor and you'll get a link where you can manage everything through your browser. Much more convenient than typing commands.
World Management
World Border
Limit your world size, or players will wander millions of blocks out and your world folder will balloon to 50 GB:
/worldborder set 10000
/worldborder center 0 0
This limits the world to a 5000-block radius from center. Enough for most servers.
Pre-generation
Lag often spikes when players explore new chunks because the server has to generate them on the fly. The solution is to pre-generate the world:
- Install the Chunky plugin
/chunky radius 5000/chunky start- Wait (can take hours)
After this, the entire world within the border is pre-generated, and there won't be lag spikes when exploring.
Multiple Worlds
If you need several worlds (like a separate building world or event world), use Multiverse-Core:
/mv create creative_world normal -t flat
/mv tp creative_world
/mv modify set gamemode creative creative_world
Backups
This is the single most important topic that beginners ignore. Until disaster strikes.
What to Back Up
- World folders (
world/,world_nether/,world_the_end/) - The entire
plugins/folder (configs + data) server.properties,ops.json,whitelist.json,banned-players.json
Manual Backup Script
The simplest approach - a cron script:
#!/bin/bash
BACKUP_DIR="/home/minecraft/backups"
SERVER_DIR="/home/minecraft/server"
DATE=$(date +%Y-%m-%d_%H-%M)

# Tell the server to save
screen -S minecraft -p 0 -X stuff "save-all$(printf '\r')"
sleep 10
screen -S minecraft -p 0 -X stuff "save-off$(printf '\r')"

# Create the archive
tar -czf "$BACKUP_DIR/backup_$DATE.tar.gz" \
  "$SERVER_DIR/world" \
  "$SERVER_DIR/world_nether" \
  "$SERVER_DIR/world_the_end" \
  "$SERVER_DIR/plugins" \
  "$SERVER_DIR/server.properties"

# Re-enable auto-save
screen -S minecraft -p 0 -X stuff "save-on$(printf '\r')"

# Delete backups older than 7 days
find "$BACKUP_DIR" -name "backup_*.tar.gz" -mtime +7 -delete
Add to cron: 0 */6 * * * /home/minecraft/backup.sh - backup every 6 hours.
Backup Plugins
If you don't want to mess with scripts, plugins like DriveBackupV2 can back up to Google Drive or other cloud storage directly from the game.
The 3-2-1 Rule
The ideal backup strategy:
- 3 copies of your data
- 2 different storage types (local disk + cloud)
- 1 copy off-site
Losing a world that players poured hundreds of hours into is a server-killer. Don't skimp on backups.
For more on backup strategies, check out our backup strategy guide.
Player Management: Ban, Kick, Mute
When to Kick
A kick is a soft measure. The player can rejoin immediately. Use it for:
- First warnings
- Minor rule violations
- AFK players taking up slots
When to Ban
A ban is serious. Typical reasons:
- Griefing (destroying other players' builds)
- Cheating (X-ray, fly, killaura)
- Duping (exploiting bugs to duplicate items)
- Toxic behavior (insults, threats)
- Advertising other servers
Tip: always include a ban reason. Useful for you and clear for the player.
/ban griefer123 Griefing player Steve's base
/tempban toxicPlayer 7d Chat abuse
IP Bans
Use carefully. IP bans block all accounts from that IP. If the player has a dynamic IP, the ban is useless. If it's static, you might accidentally ban an entire household or dorm.
Muting
For players who can't behave in chat but play fine otherwise. Requires a plugin like Essentials:
/mute toxicChatter 2h Chat spam
Logging
Install CoreProtect. It's a must-have plugin that records EVERYTHING: who placed a block, who broke it, who opened a chest. When someone reports griefing:
/co inspect
Click the damaged block and you'll see who did it and when. Invaluable.
Whitelist
A whitelist means only approved players can join the server. Enable it when:
- The server is private (friends only)
- You're being raided by bots or griefers
- You want to control who gets in
/whitelist on
/whitelist add FriendBob
/whitelist add FriendAlice
For public servers, you usually don't need a whitelist, but keep it as a fallback option in case of an attack.
Basic Security
Don't Give Out OP
Seriously. OP is full access to the server. Even moderators don't need OP. Use LuckPerms and grant only the permissions they actually need.
online-mode=true
Always. No exceptions. Pirate servers with online-mode=false are a security nightmare. Anyone can join under your name and get your permissions.
Keep the Server Updated
Every Paper/Spigot update includes security fixes. Don't sit on a six-month-old version. Check for updates at least monthly.
Install Anti-Cheat
On any public server. Options:
- Geyser AntiCheat - for Bedrock players
- Vulcan - one of the best, paid
- Spartan - good free option
Exploit Protection
Install plugins to protect against common attacks:
- Book and sign content limits (BookTroll protection)
- Entity limits (EntityLimiter)
- Crash packet protection
For a deeper dive into server security, check our security checklist and security plugins review.
DDoS Protection
Sooner or later, your server will get attacked. It's not a question of "if" but "when." Even small servers with 10 players get DDoS'd. Basic hosting-level protection often can't handle attacks targeting the Minecraft protocol.
Use specialized solutions like MineGuard that filter traffic at the game protocol level and only let legitimate players through.
Common Beginner Mistakes
Mistake 1: Giving Everyone OP
"They're my friends, it's fine." Then a friend wrecks the spawn, or their account gets compromised, or they /op someone else. Use LuckPerms.
Mistake 2: No Backups
"What could go wrong?" A lot. The disk dies, the world corrupts, someone with OP runs the wrong command. No backup means starting from zero.
Mistake 3: 50 Plugins on Day One
Don't install everything at once. Start with the essentials: EssentialsX, LuckPerms, CoreProtect, WorldEdit. Add one at a time, test each one. 50 plugins = 50 sources of lag and conflicts.
Mistake 4: No Rules
Without clear rules, everyone decides for themselves what's allowed. Write simple rules and put them at spawn. At minimum:
- No griefing
- No cheats
- No insults
- No spam
Mistake 5: Ignoring Logs
Logs are your eyes and ears. When something goes wrong, the answer is almost always in logs/latest.log. Learn to read them.
Mistake 6: Never Updating
Old version = known vulnerabilities. Update the server, plugins, and Java. This isn't optional.
Mistake 7: Open RCON
RCON is remote access to the server console. If it's enabled with a weak password and exposed to the internet, you will get hacked. Either disable RCON or close the port with a firewall.
enable-rcon=false
Mistake 8: World Border Set to a Million Blocks
Without a world border, players can walk millions of blocks from spawn. The world will grow to a terabyte, backups become impossible, and lag becomes permanent. Set a border immediately.
What to Do Next
After the basics are in place:
- Install and configure plugins one at a time
- Set up automated backups
- Write server rules
- Appoint moderators through LuckPerms (not OP)
- Set up monitoring (Spark for TPS, CoreProtect for logging)
- Get DDoS protection sorted
Administration is an ongoing process. You'll learn as you go. The main thing is: don't ignore security and backups. Everything else can be fixed.
Protect Your Server from DDoS Attacks
Free protection with 5-minute setup. 1 TB bandwidth included.
Try for FreeRelated Articles
Skript: scripting basics for Minecraft server admins (2026)
Skript lets you ship server logic without learning Java. Install, syntax basics, events, commands, variables, addons like skBee and skript-yaml, common pitfalls and how to dodge them.
EssentialsX: Complete Setup Guide for Minecraft Server Basics 2026
Installation, modules, config, economy, kits, warps and LuckPerms permissions. Everything you need to know about EssentialsX in 2026.
Citizens: NPCs and quest characters on a Minecraft server
Full Citizens guide: install, skins, traits, click commands, Quests, Denizen and Sentinel integration, holograms and performance tuning.